How To Use Riverbox Notebooks
Through this chapter, there will be a series of tutorials on how to use Riverbox.
This assumes you already have a deployment of riverbox that you are accessing through the web portal.
Execute the Sample Notebook
This is a basic tutorial to walk you through the steps to go from logging in to executing a riverbox notebook
Login
- From the landing page of the website, login.
- This could be an OAuth or username-password style credentials.
- Check with the admin of the web portal to login.
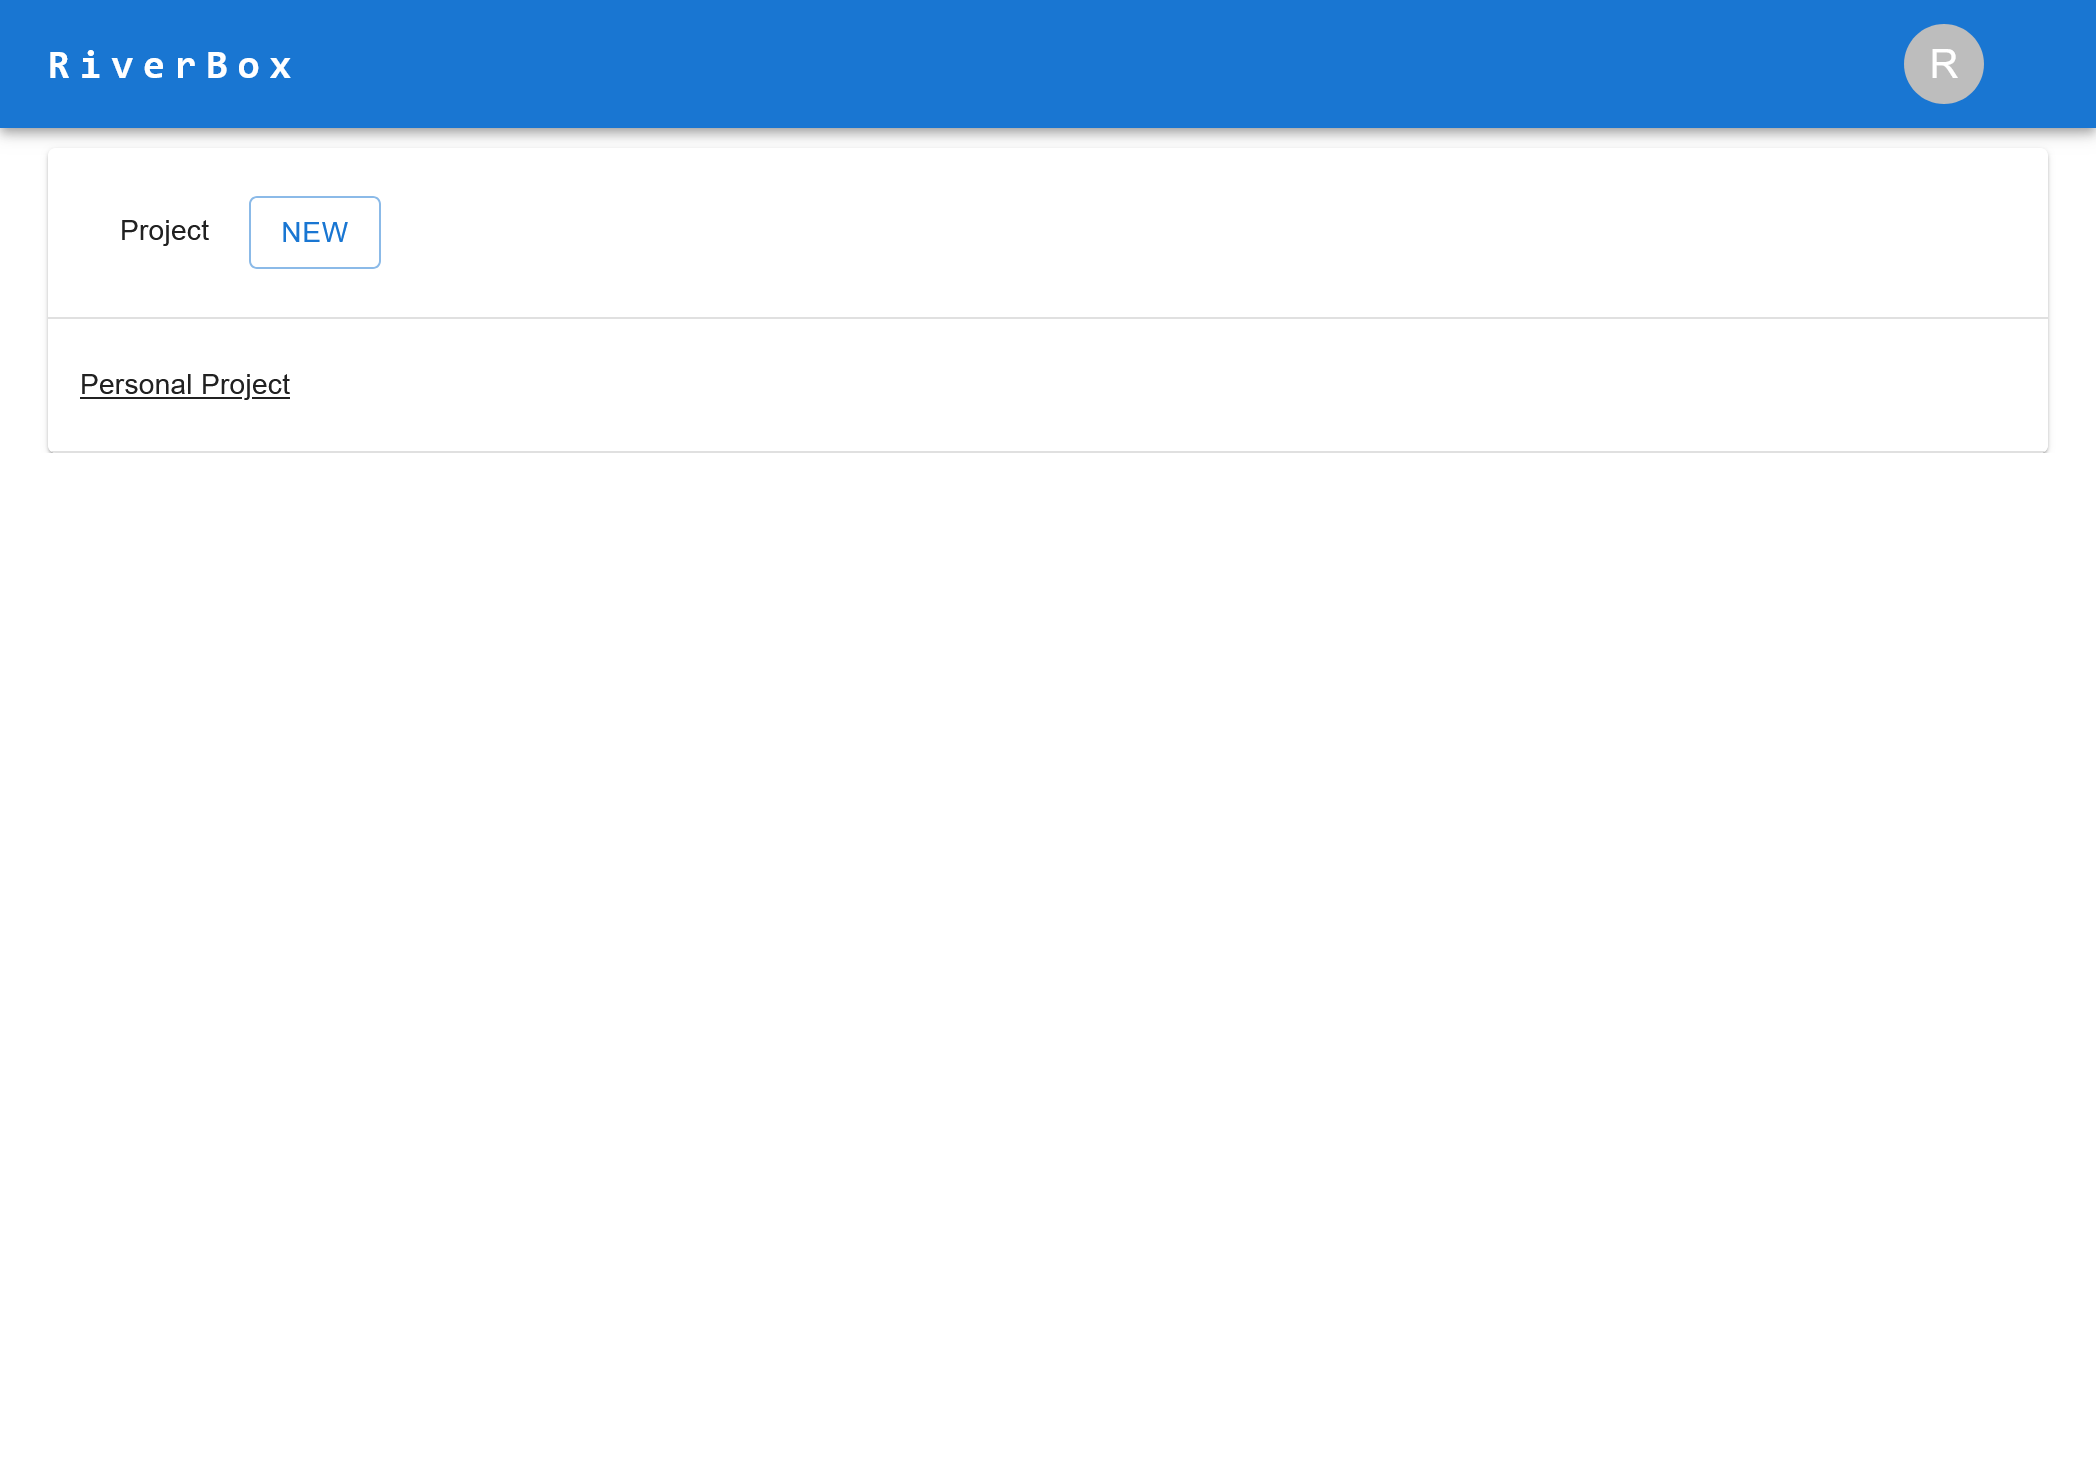
All Projects Page
- You should see a projects page as such, with one project called the "Personal Project"
- Select this Personal Project (click on it)
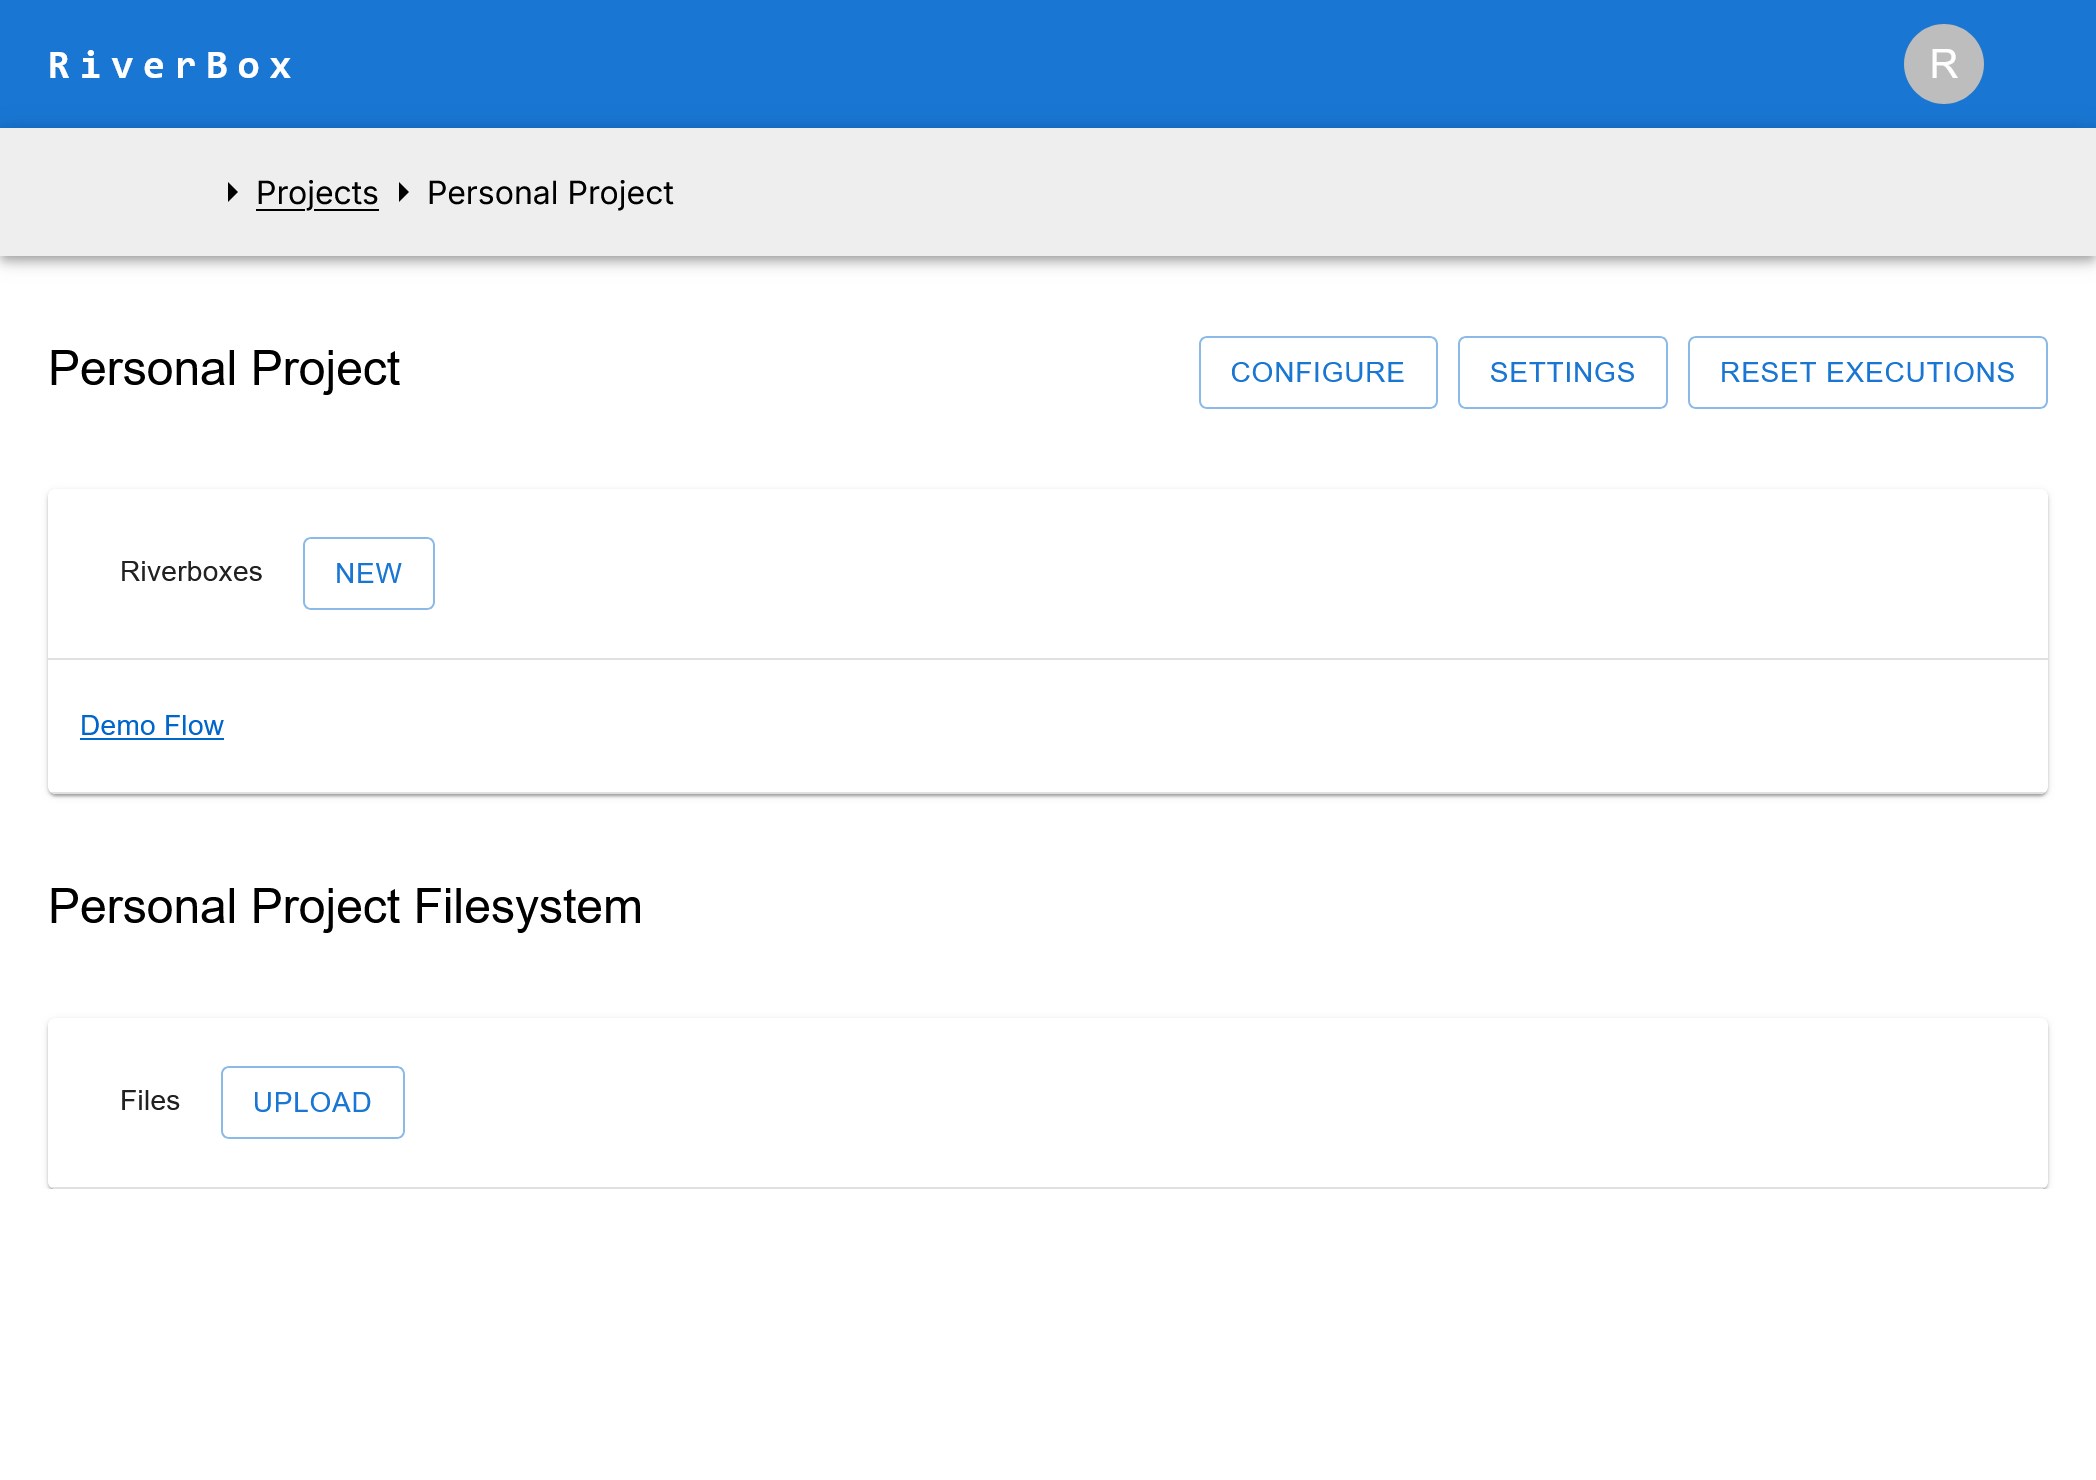
Project Page
- If you select the project, you should see a page as such, with a single "Demo Riverbox" and an empty filesystem
- Select this Riverbox (click on it)
Riverbox Page
- If you selected the Demo riverbox, you should see a riverbox page that looks like this

- Here, you can click execute on the top bar, and from the drop-down select Run All to execute all cells (boxes) of this Notebook
- To do a Jupyter Notebook style execution, you can also select "Debug Mode"
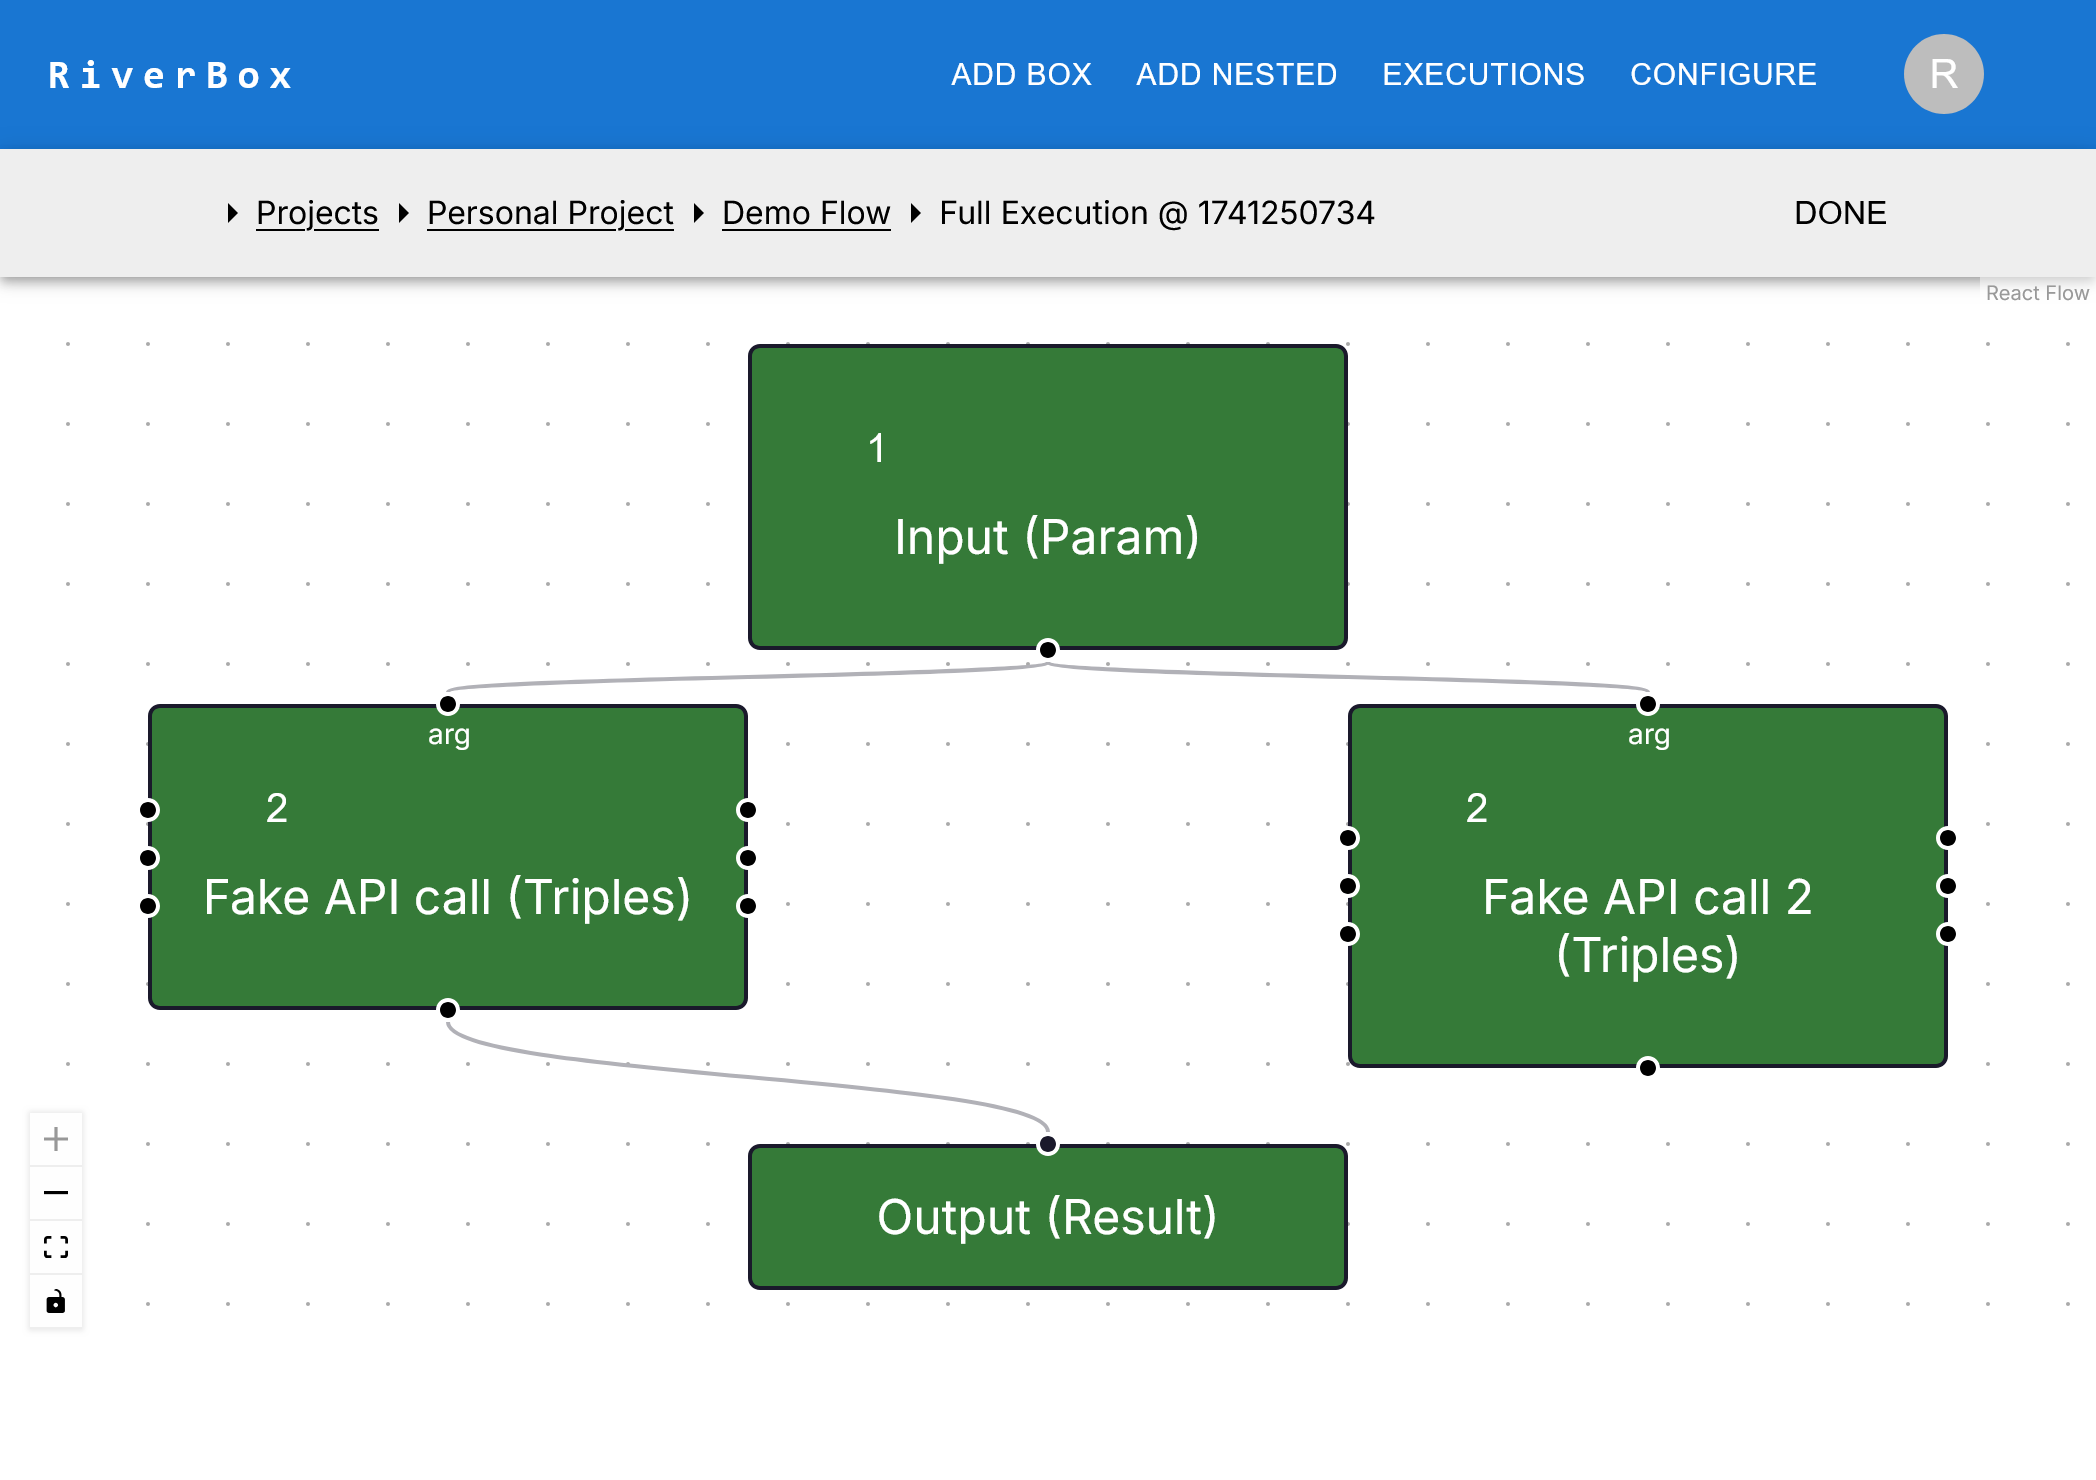
Execution Page
- The execution page will show the cells with an execution counter on the top
- On the second navbar, there should be a status indicator on the status of the execution
- The execution should start with maybe a slight delay, and boxes should turn green (successful, complete execution) and yellow (in progress)
- After the execution is completely finished, your screen should look something like this
Use an External Call in a Notebook
This is a basic tutorial to walk you through the steps to go from logging in to executing a riverbox notebook by calling an external call to a pre-made notebook
This is a whole separate project, with its own filesystem. It has a paper about "Delayed Fair Sharing" you can ask about on its filesystem (RAG).
Note that the "vLLM" riverbox runs a "base model", so answers may not be what you expect from "instruction tuned" models.
Login
- From the landing page of the website, login.
- This could be an OAuth or username-password style credentials.
- Check with the admin of the web portal to login.
All Projects Page
- You should see a projects page as such, with one project called the "Personal Project"
- Select this Personal Project (click on it)
Project Page
- If you select the project, you should see a page as such, with a single "Demo Riverbox" and an empty filesystem
- Make a new empty riverbox here, by clicking the NEW button
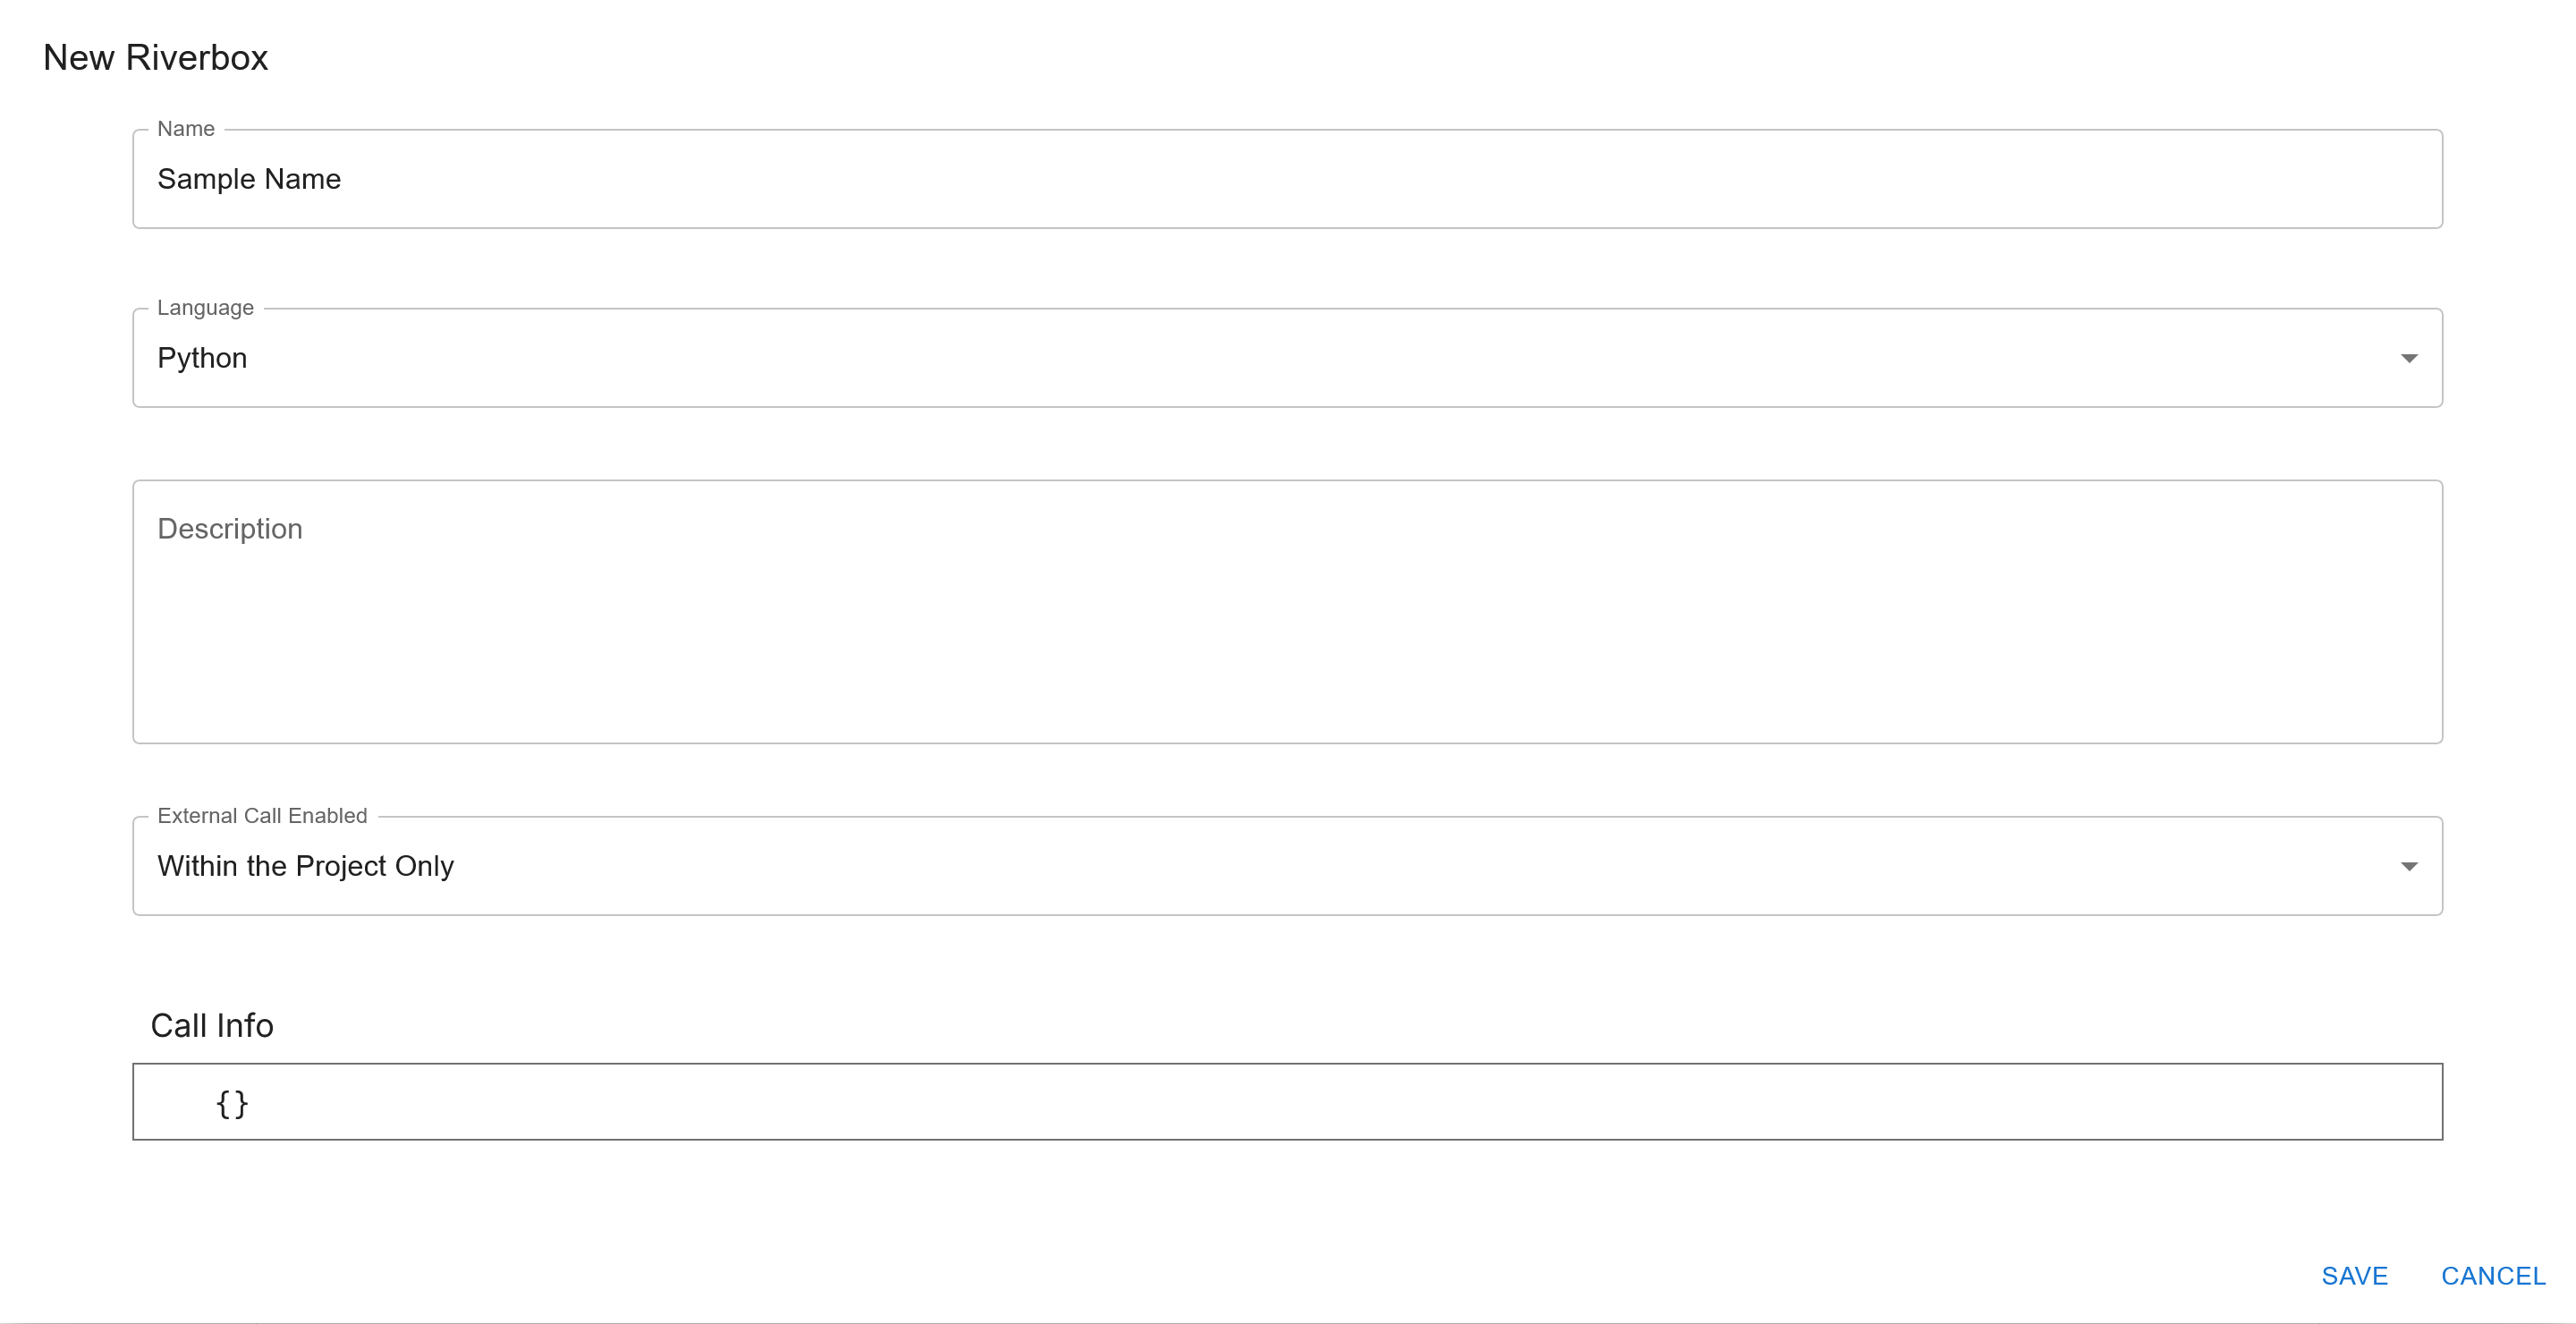
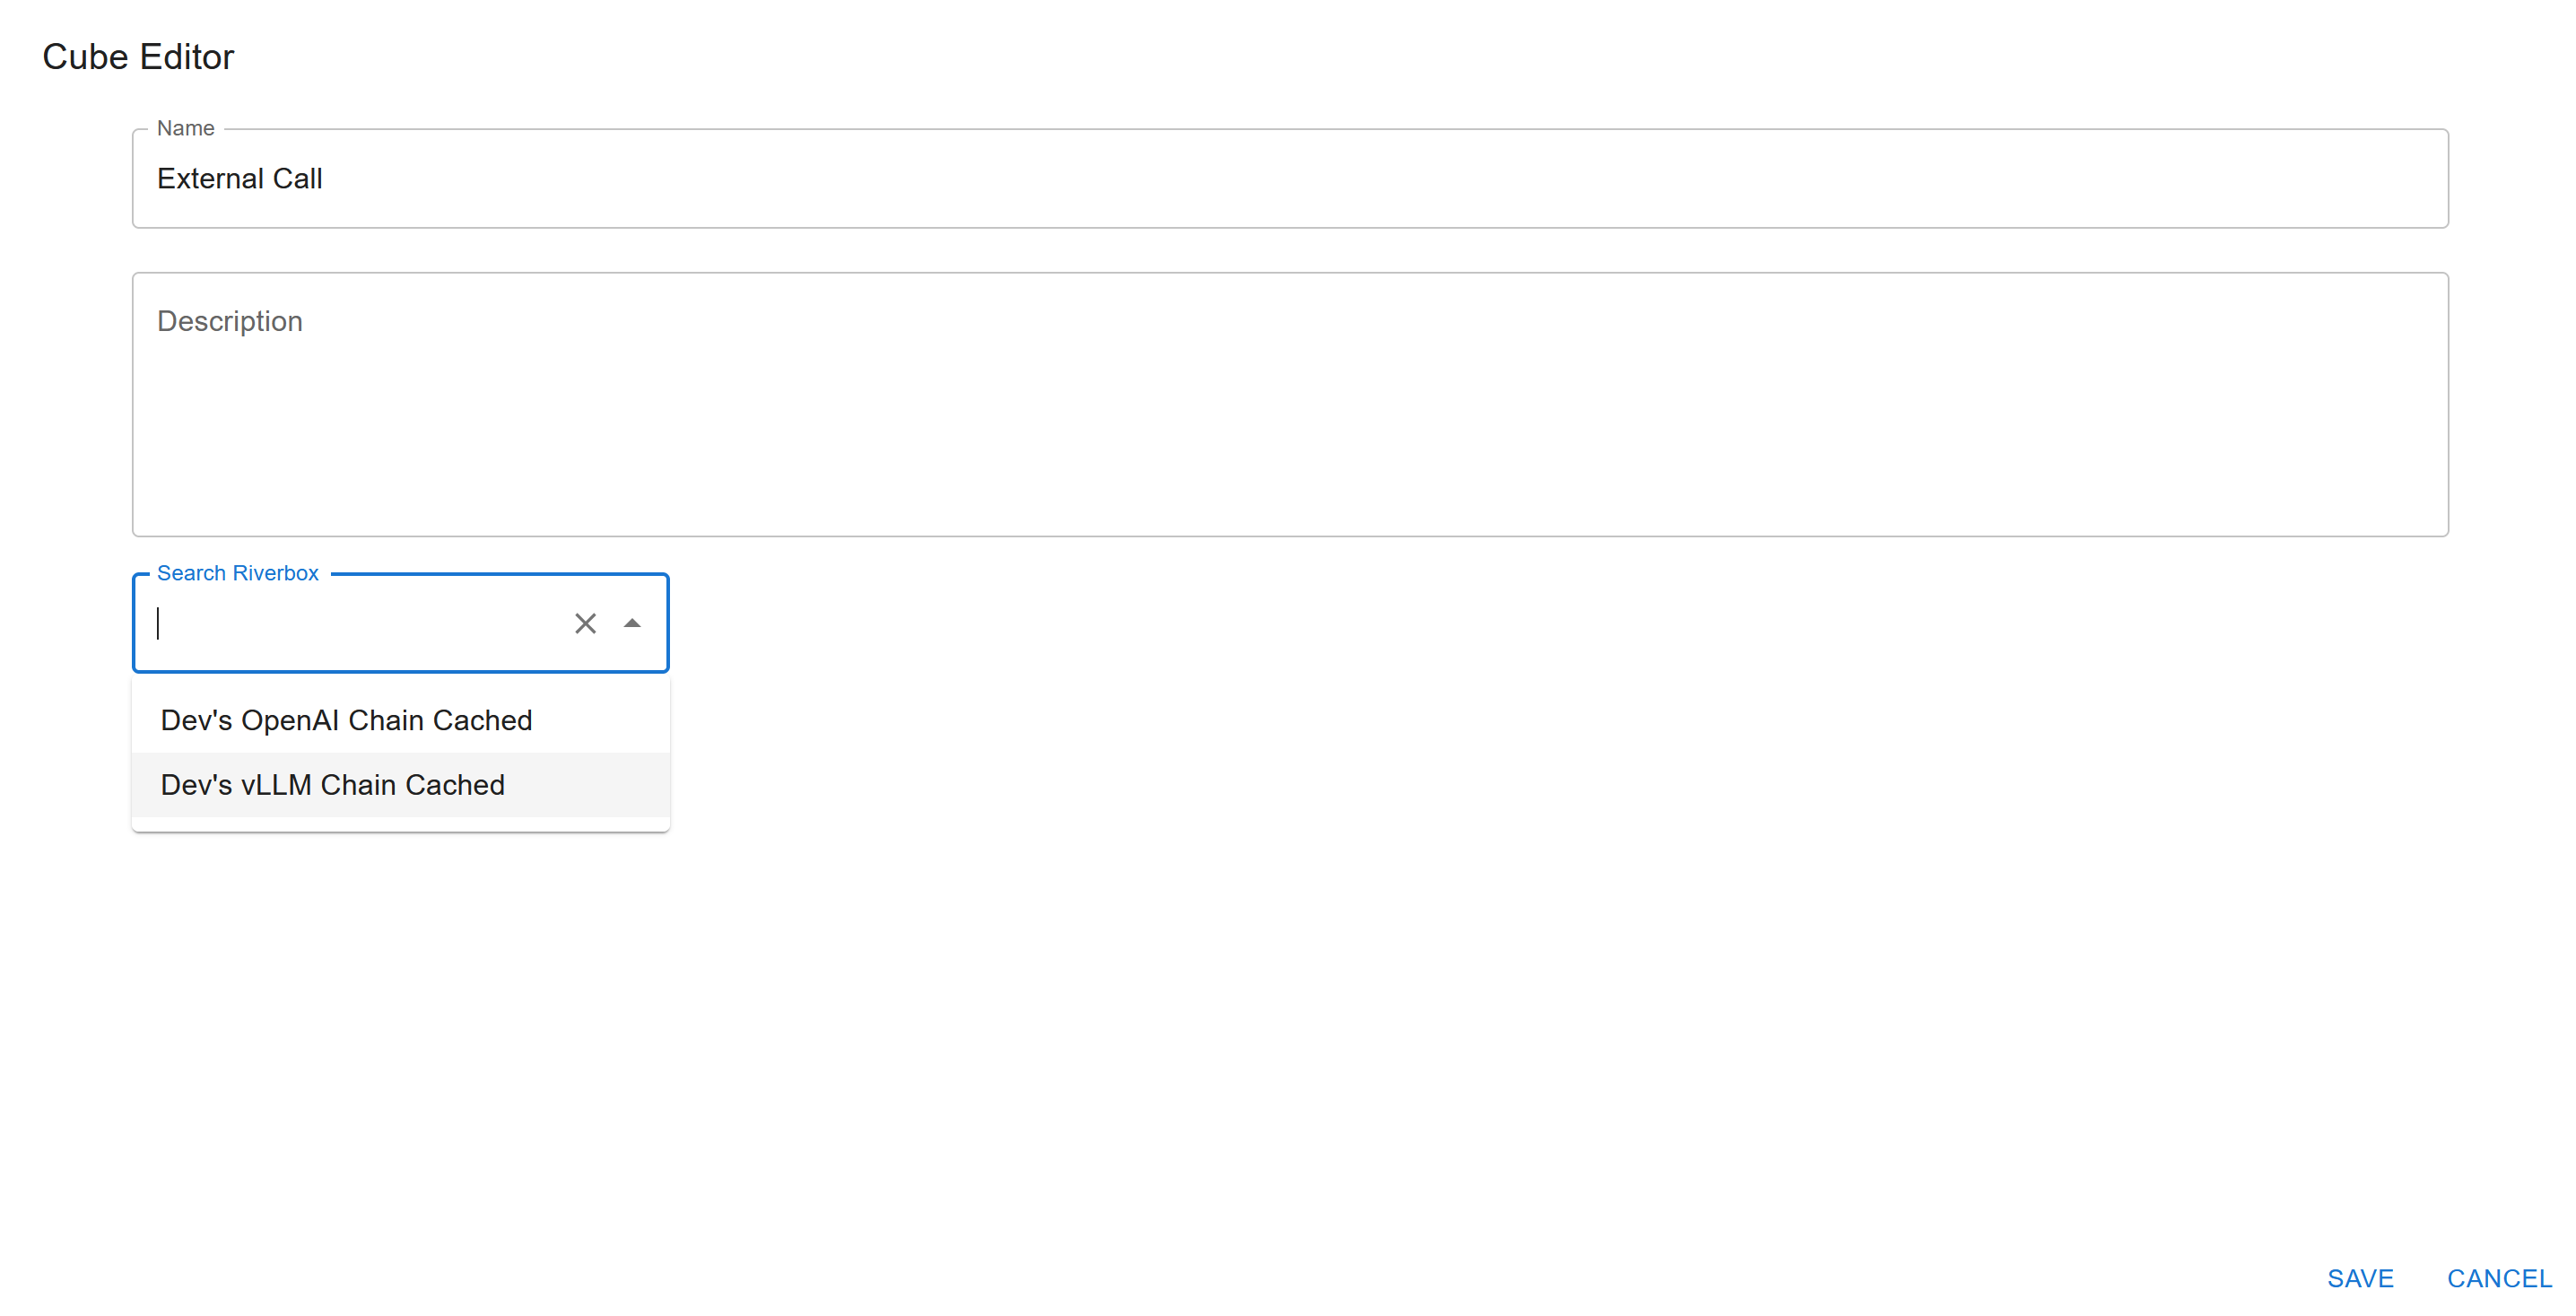
New Riverbox
- You should see a form that looks as such
- You should only need to enter a name here, and click save, or press ctrl + s
Once you do this, you should see an empty Riverbox page that looks like this

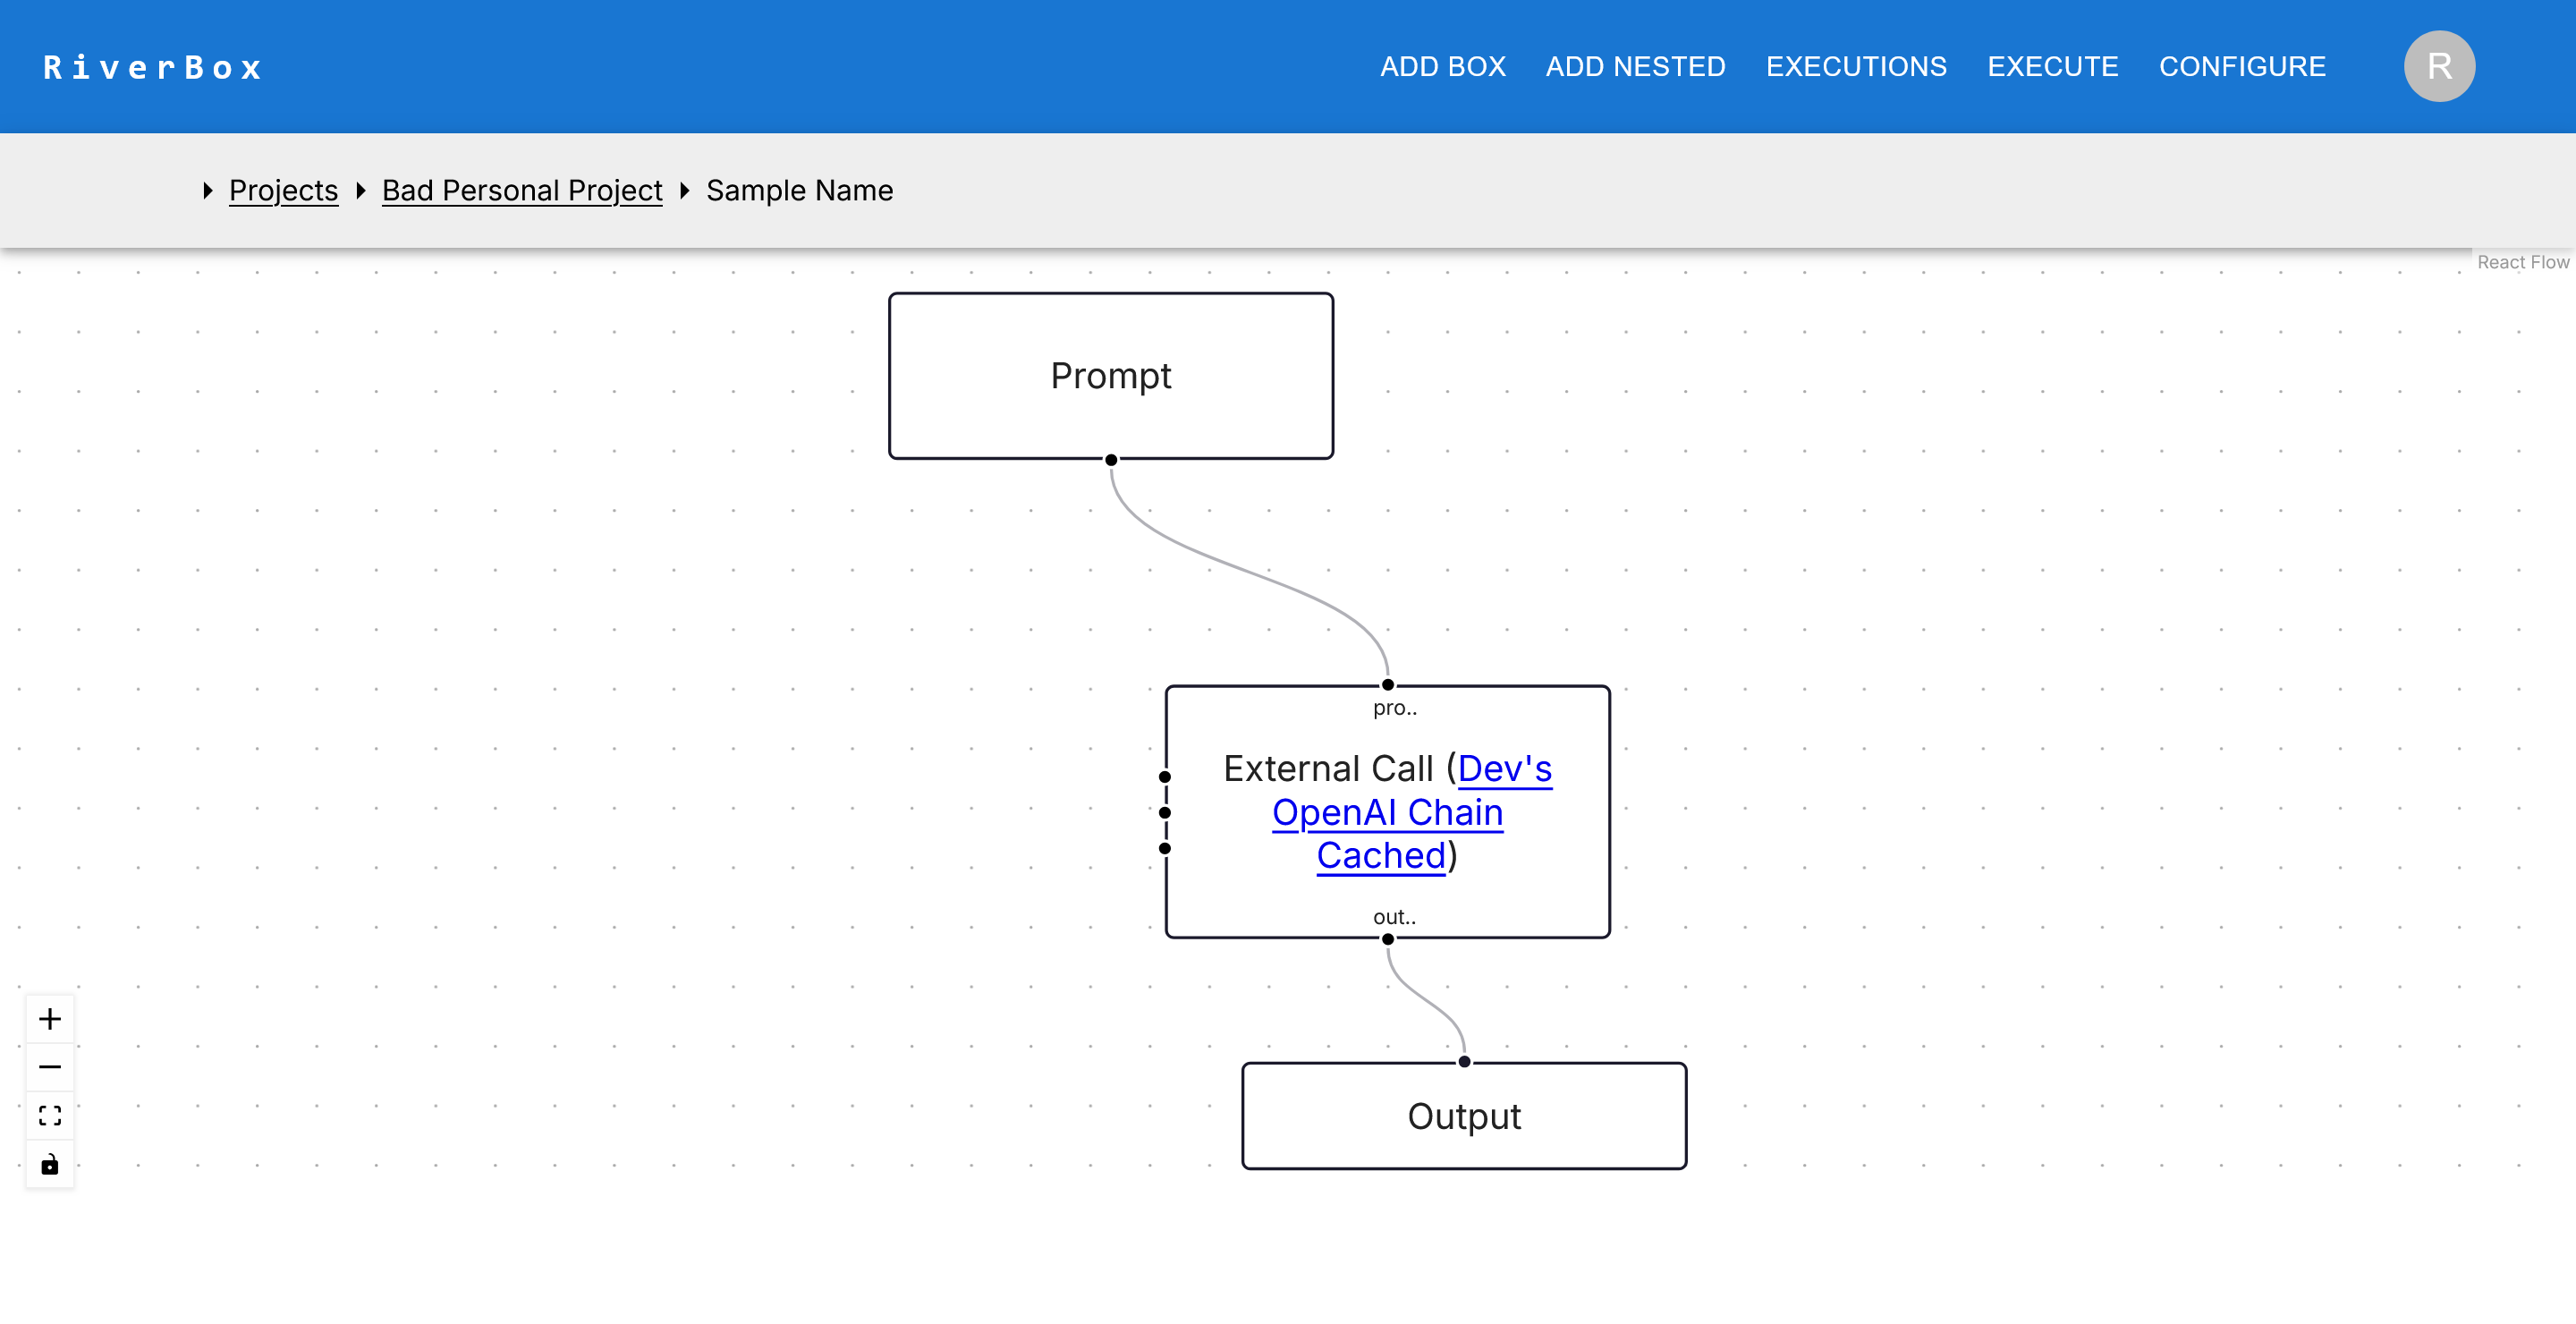
External Call
- Now it is time to add the box that calls into my external riverbox
- Make a "NEW NESTED" box, and search for "Dev's" in the search bar. You should see two options, a OpenAI one and a vLLM one.
- You can pick either one, or both in parallel!
- You can now add an input box, with a "Default Value" of the prompt (s) you want to test out, a long with (optionally) an output box
- Alternatively, you can add a new code box, and have a single line
rbxm.output = "{whatever you want the prompt to be as a python string}"
- Alternatively, you can add a new code box, and have a single line
- Your riverbox should look something like this:
Execute
- Now you can execute the riverbox
- You can execute all cells, or run it in "Notebook mode" for arbitrary cell order execution, like a computational Notebook
- If you run in Notebook mode, remember to kill the execution when you are done
- Here is what the execution should look like
